Post
Salesforce “How To” ABCs: D
Posted on February 28, 2019 (Last modified on January 16, 2026) • 3 min read • 553 wordsHow to Delete a User.

Like the Library of Alexandria, the Salesforce ecosystem contains an unmatched collection of knowledge, insight, and history. And, like the ill-fated library, it can sometimes feel like all of the handy, practical knowledge that you’ve acquired over the years has disappeared. Gone in a puff of smoke.
But you have something the ancient Alexandrians didn’t — Google!
When the never-ending supply of new, helpful Salesforce tips and tricks pushes something more basic out of your brain you can turn to the web and refresh your memory.
Today, we’ll continue our journey through the most commonly forgotten (and then searched) tasks with another installment of the Salesforce “How To” ABCs! This time it’s ‘D’ as in “How to Delete a User”.
Let’s get started!
Spoiler alert, this one actually has a little twist: technically, you can’t delete a user. Instead what we’ll have to do is deactivate them.
That’s because Salesforce thinks that our users, like former loves, can’t (and shouldn’t be) be erased or forgotten, but only temporarily removed from the active forefront of our internal orgs. Not really — it’s actually because those users might still own records (contacts, accounts, leads, etc…) and deleting them could create issues and would also affect the audit trail (so when you look back to see who made what changes you won’t just see a bunch of “[deleted user]”s). Luckily, deactivating users will accomplish everything we’d want out of a deletion, with the added benefit of preserving our data. Here’s how we do it.
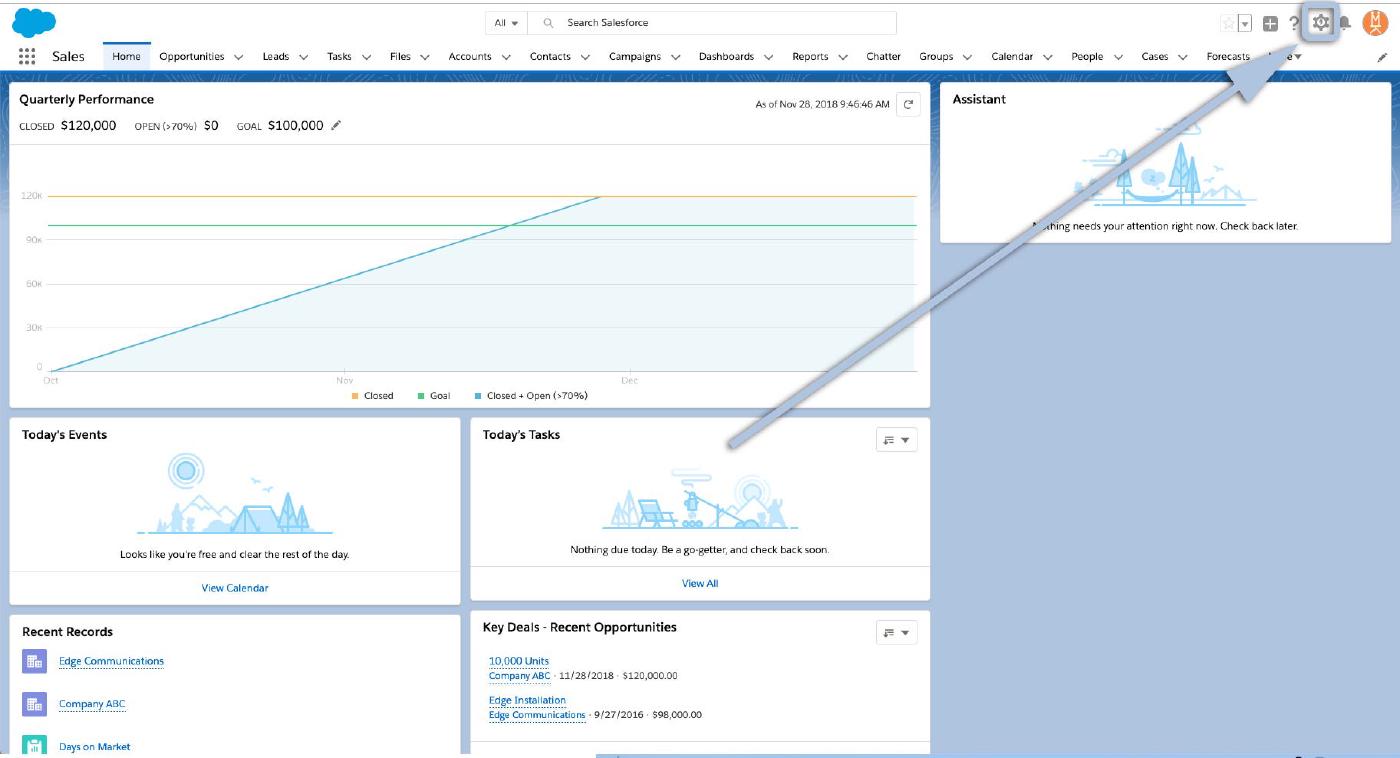
First, navigate to Setup by clicking the cog in the top right corner of your org.
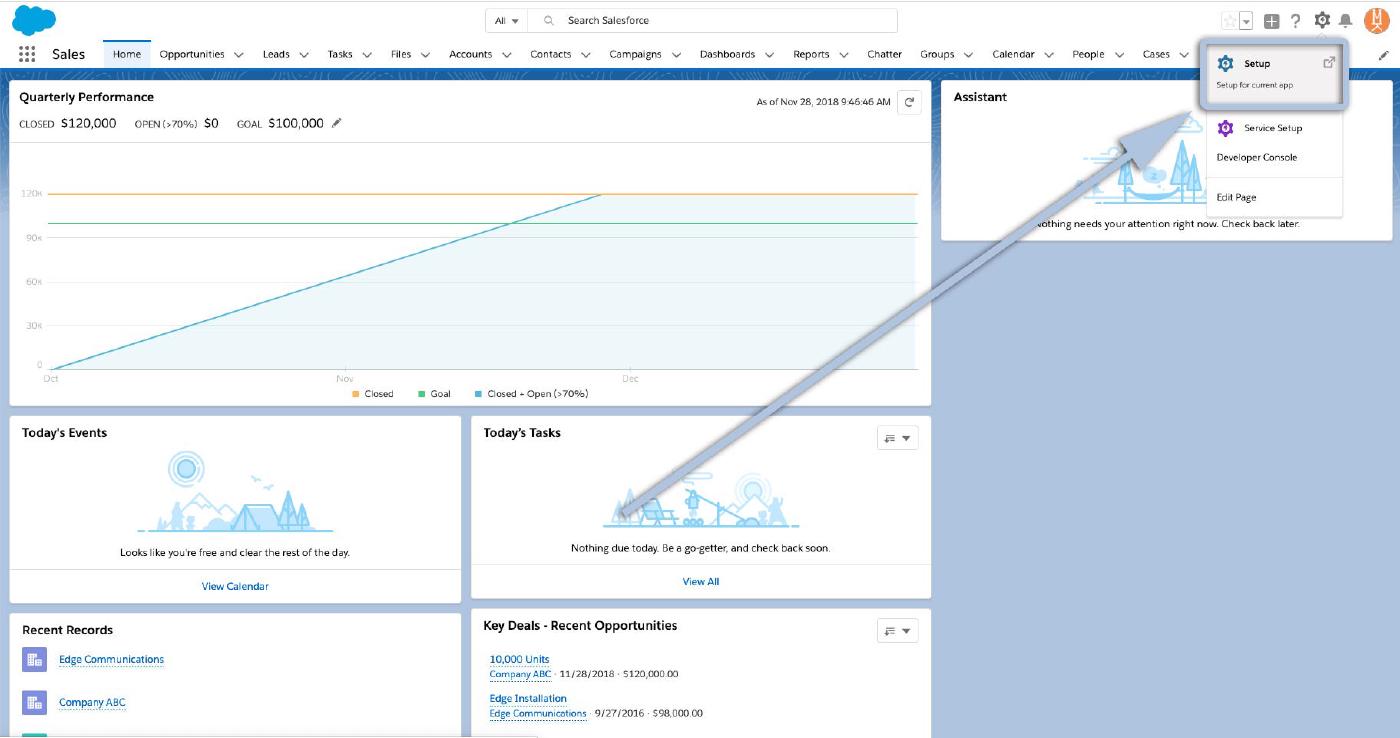
Then select “Setup” from the menu that drops down.
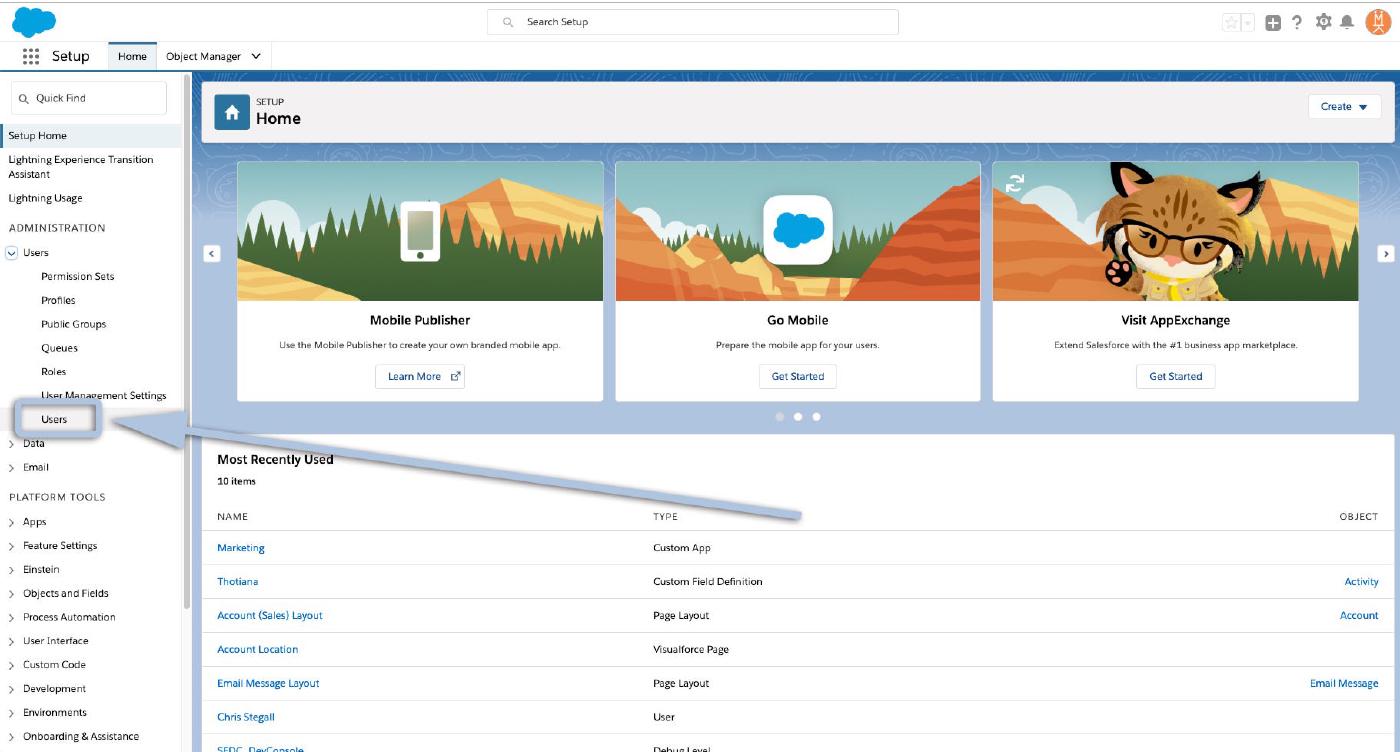
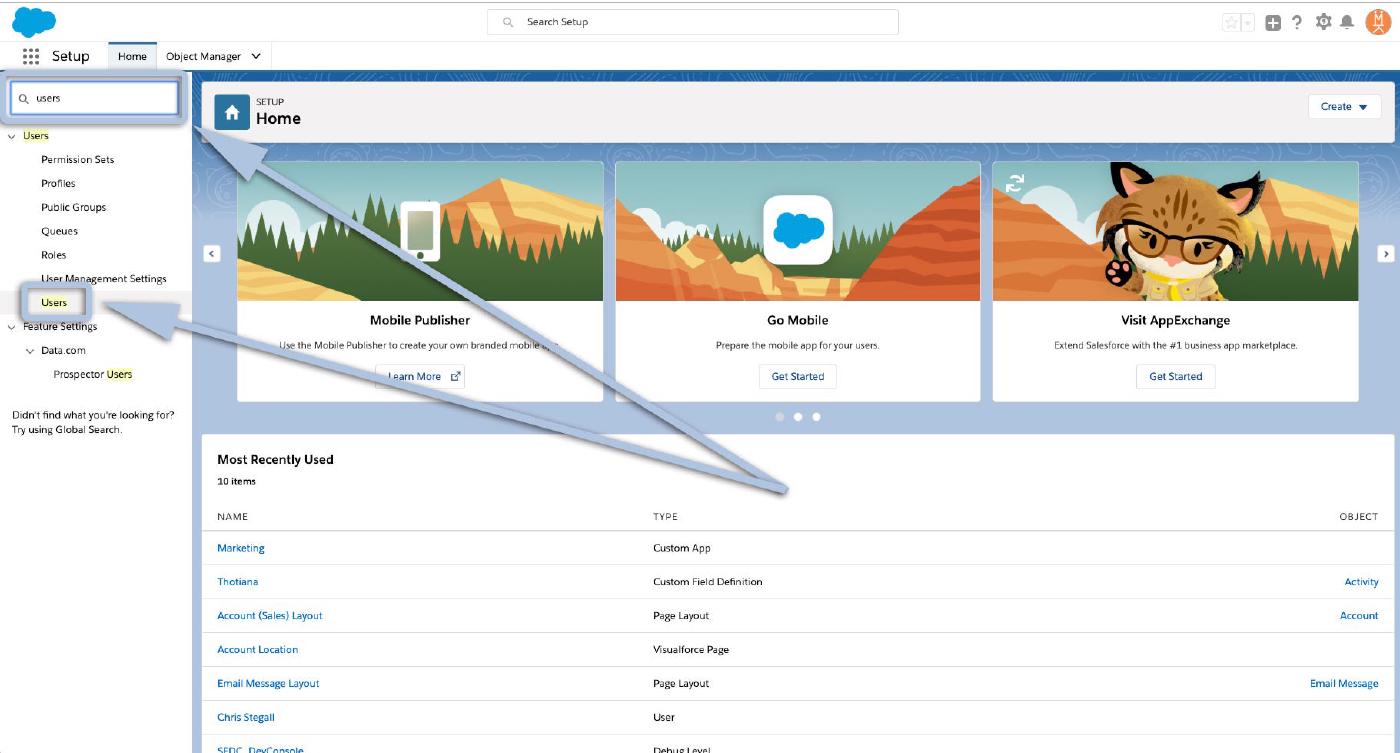
Once in Setup, select Users from the menu bar on the left side.
Or, instead of scrolling through all the options, enter “users” in the Quick Find box and select it from there.
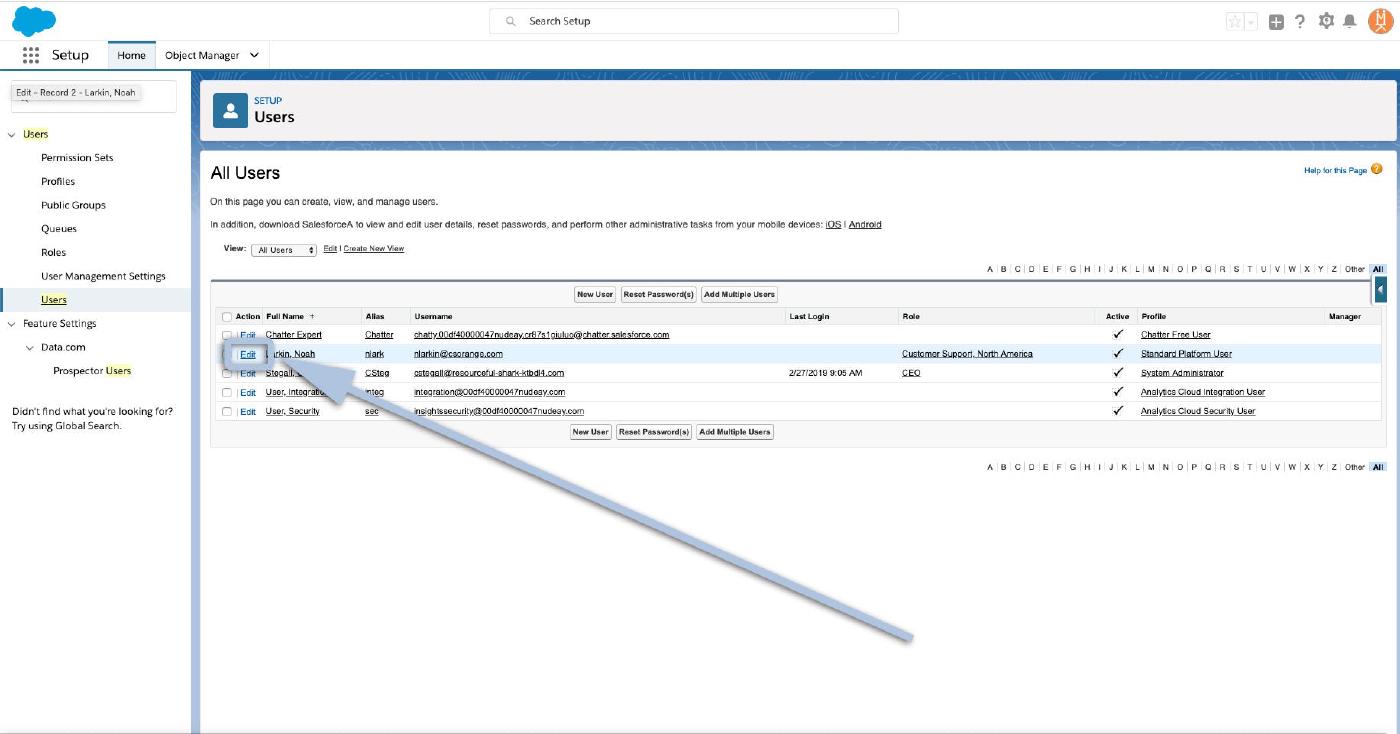
Now, you’ll be on your Users page and see a list of all your org’s users. Click “Edit” next to the user you’d like to deactivate.
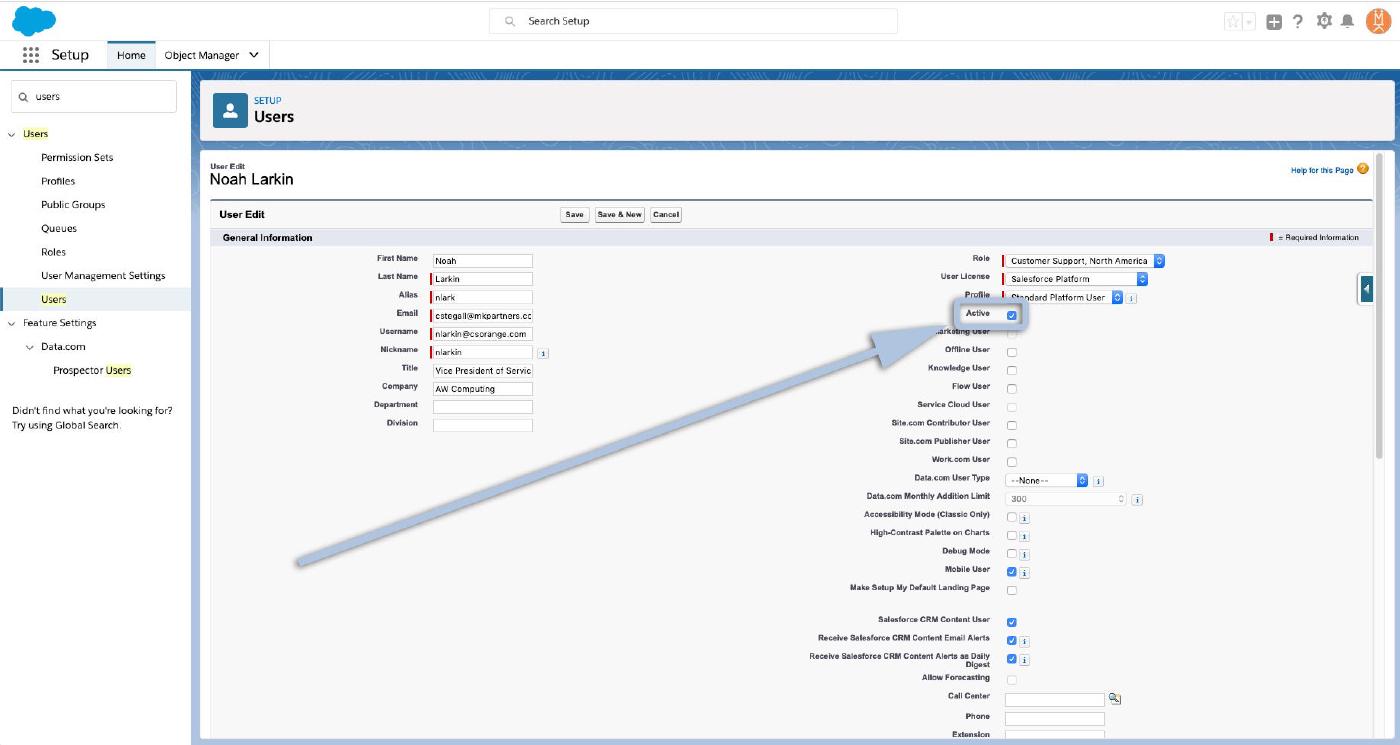
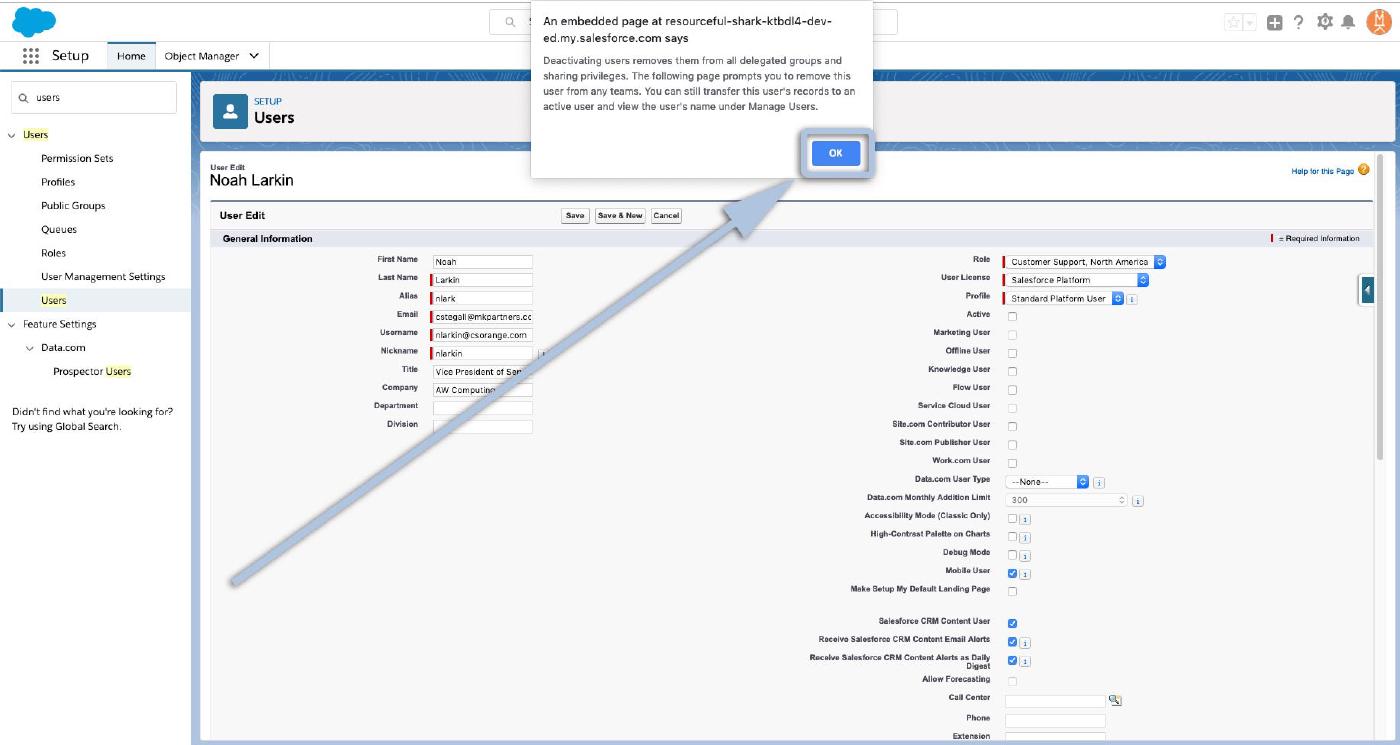
Almost there! On your User Edit page locate the ‘Active’ checkbox and click it once to de-select it (un-check it).
That’ll trigger a pop-up dialogue box warning you what will happen when you deactivate the user — removing them from all delegated groups and sharing privileges, etc… It also helpfully lets you know that you’ll still be able to transfer the deactivated users records to an active user and that they’ll still show up under “Managed Users”.
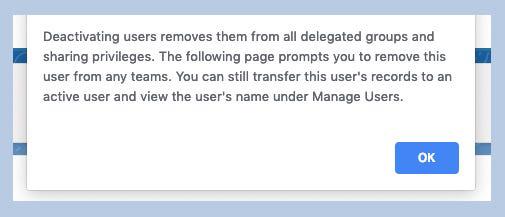
Click ‘OK” when you’re ready to continue.
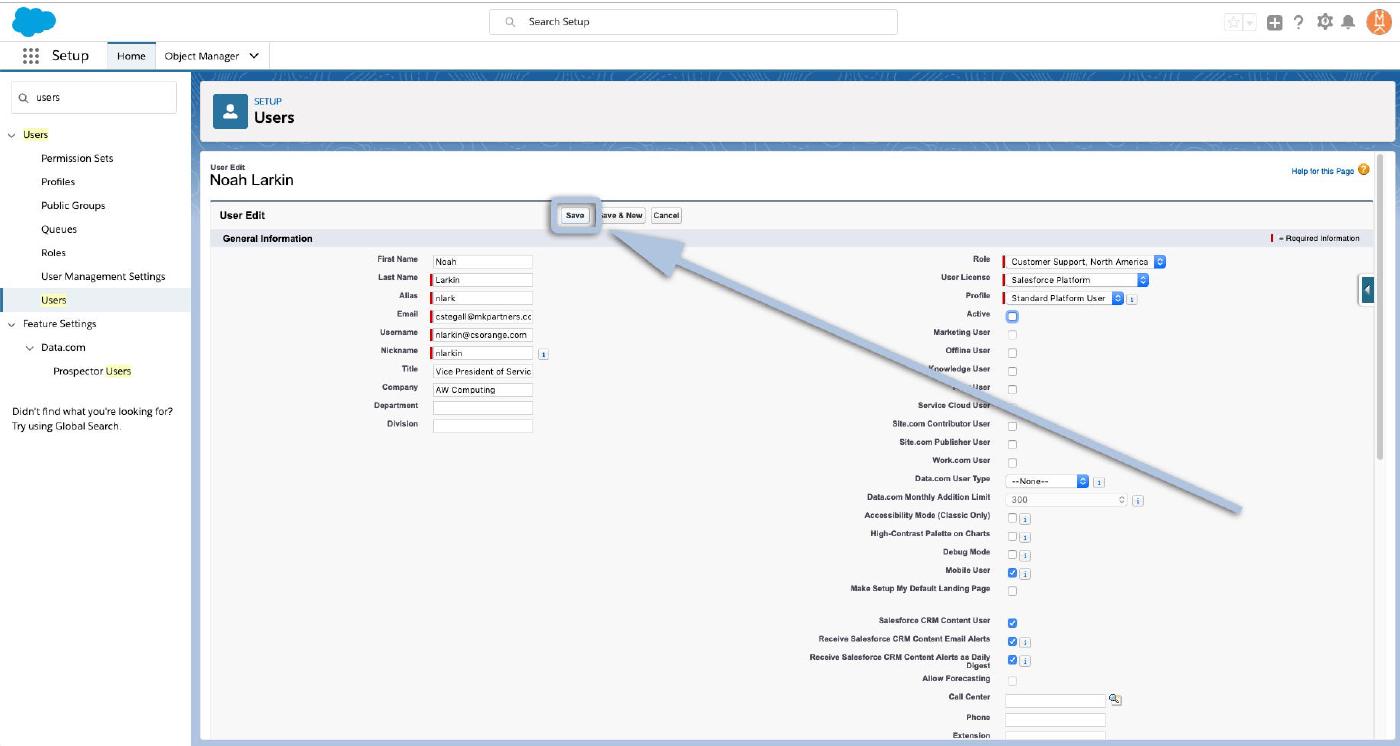
Lastly, click “Save” on the User Edit page to finalize the deactivation.
And you’re all set! You’ll still the user on your list of users, but you’ll notice they’re no longer listed as “Active”!
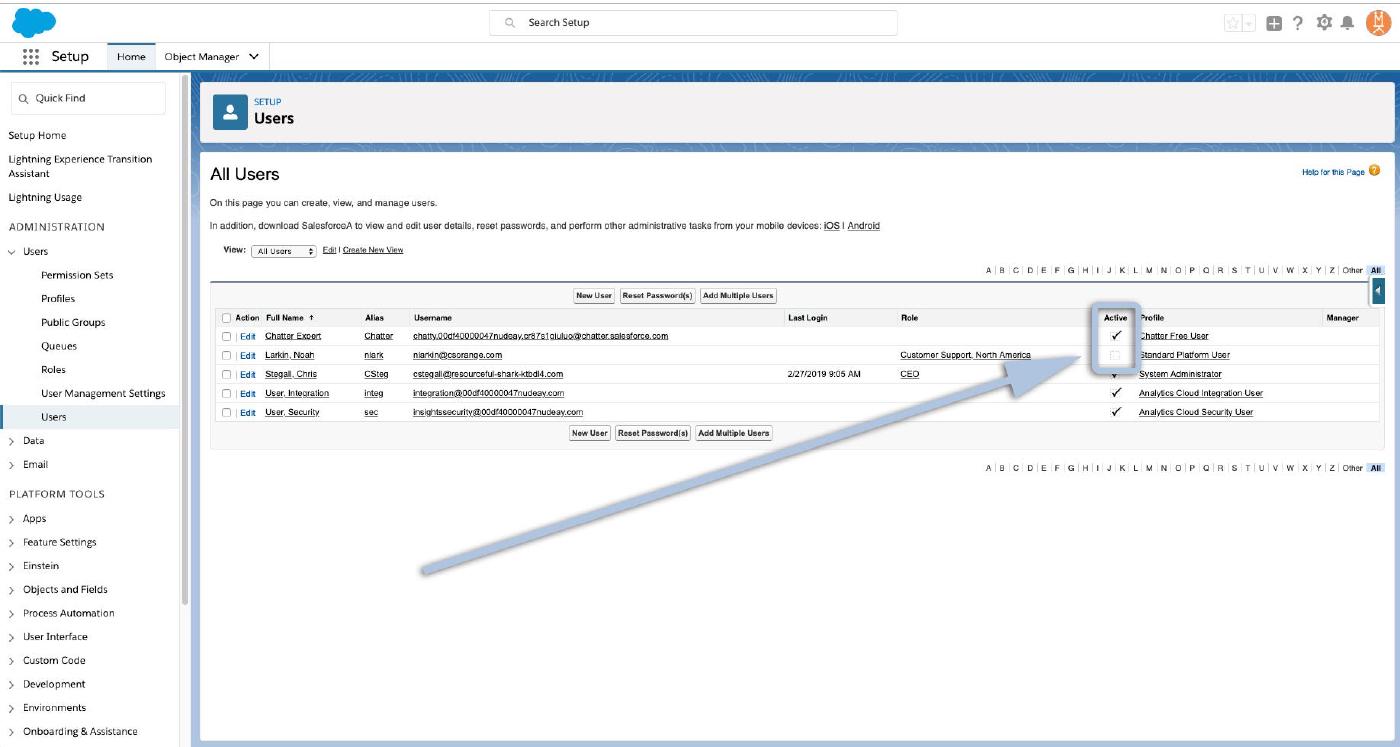
Congratulations your user’s been deactivated!
Just a heads up, while that user will no longer count toward’s your org’s available licenses, if you’re not adding a new user and want to instead reduce your license count you’ll still need to reach out to your Salesforce rep — removing users won’t automatically reduce your bill accordingly. And here’s a helpful list with a few other things to consider when deactivating accounts.
As always, follow us here for more Salesforce tips, tricks, and “How to” ABCs! And in the meantime, keep working hard smart and happy. We’ll see you in the cloud!